08: CNC milling, Molding & Casting
This week we worked on CNC, molding, and casting. For CNC, we used laterally cutting bits, uploaded DXF workflows, and configured cut depths and pass strategies.
1) CNC
- Developing the patterns
- Conversion to bitmaps
- Formatting and toolpath setup
- CNC milling
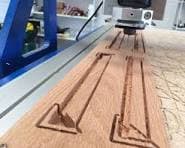
Object
I decided to CNC mill a tabletop piece of my roommates. I started by collecting photos and cropping them into square face references.
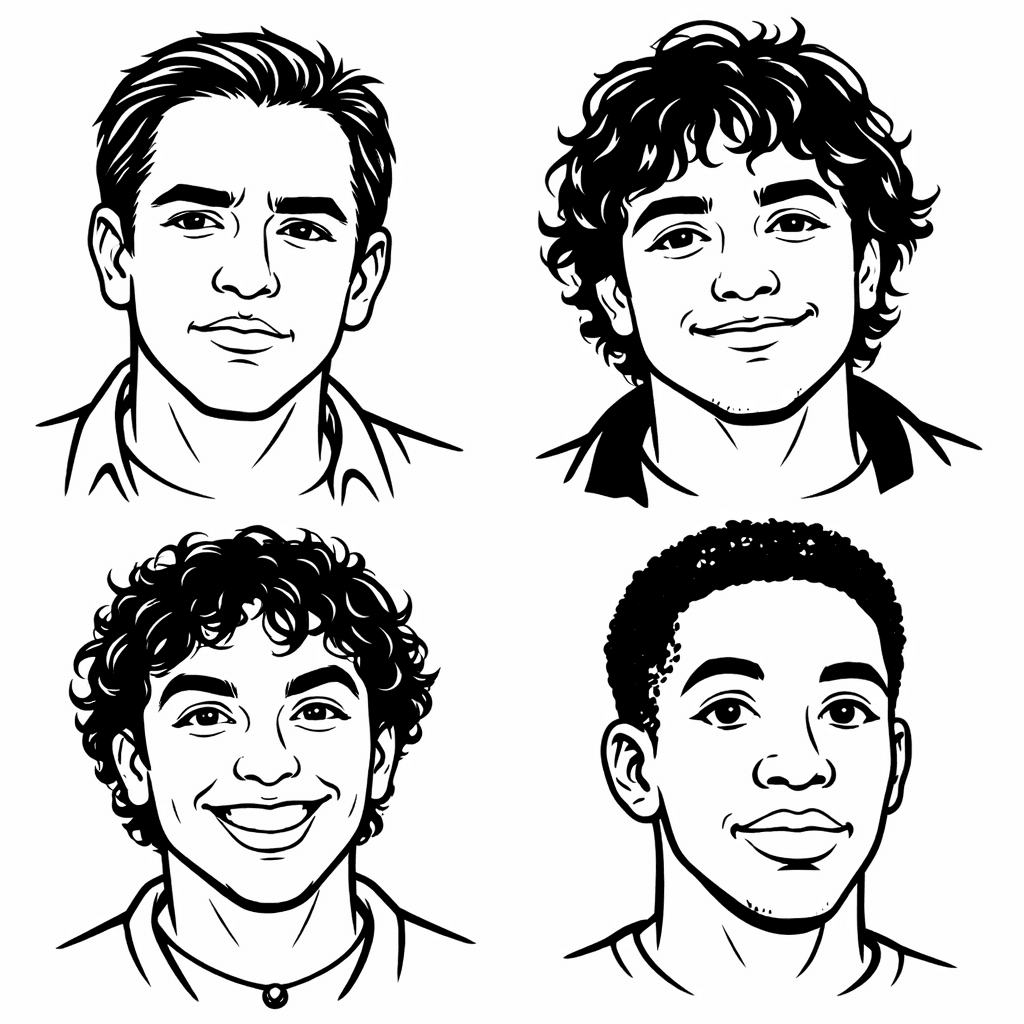
Here are the images before processing:

I explored multiple tools to simplify the images into line art:
- Pixlr drawing tools
- Photostyle Lab
- Procreate (iPad)
- ChatGPT (the one I ended up using)
Here is the prompt I used for ChatGPT's output
You are converting uploaded face images into high-quality comic-style line art optimized for vectorization and DXF export. Goal: Produce clean, expressive, black line drawings that strongly preserve the likeness and identity of each face, using lines only (no color, no grayscale shading, no fills). --- ### INPUT I will upload multiple images of human faces. Process each image individually and return a corresponding output image for each one. --- ### STYLE REQUIREMENTS - Pure black line art on white background - No color, no grayscale, no shading, no gradients - Use only lines and minimal hatching if absolutely necessary - Lines should be: - Clean, smooth, and continuous - High-contrast and well-defined - Suitable for vector tracing / DXF conversion - Style should resemble: - Editorial caricature / comic portrait - Clean ink illustration - Laser-cut / CNC-friendly outlines --- ### LIKENESS & DETAIL (VERY IMPORTANT) - Preserve facial identity accurately - Prioritize: - Eye shape and spacing - Nose structure - Mouth and expression - Jawline and face contour - Hair silhouette (simplified but recognizable) - Avoid generic or stylized faces that lose identity --- ### SIMPLIFICATION RULES - Remove unnecessary textures, noise, and background details - Flatten lighting into line decisions (NOT shading) - Keep only the most informative contours - Avoid excessive detail that would break clean vectorization --- ### OUTPUT FORMAT For each input image: - Return a clean, high-resolution black-and-white line drawing - Ensure the image is: - Centered - Cropped to the face/upper shoulders if appropriate - On a plain white background - Each output should be clearly separable (one per input) --- ### TECHNICAL CONSTRAINTS (IMPORTANT FOR DXF) - Avoid: - Sketchy or fuzzy strokes - Overlapping messy lines - Thick filled regions - Prefer: - Consistent stroke weight - Closed or near-closed contours where possible - Clean edges suitable for vector tracing --- ### BATCH INSTRUCTION - Process ALL uploaded images - Maintain consistent style across all outputs - Do NOT skip any images --- ### FINAL CHECK BEFORE OUTPUT Each result should: - Be recognizable as the same person - Use only clean black lines - Be easy to convert into vector paths (e.g., Illustrator “Image Trace” → DXF) --- If anything is unclear in an image, prioritize recognizable likeness over artistic flair. Output 4 separate images. One for each face
After generating stylized outputs, I used Inkscape edge detection and vector cleanup to prepare geometry for CNC.
I then exported the dxf file and followed the tutorial from the course website on shopbot to pick the pocket and the edge for my table. Here is an image of the final product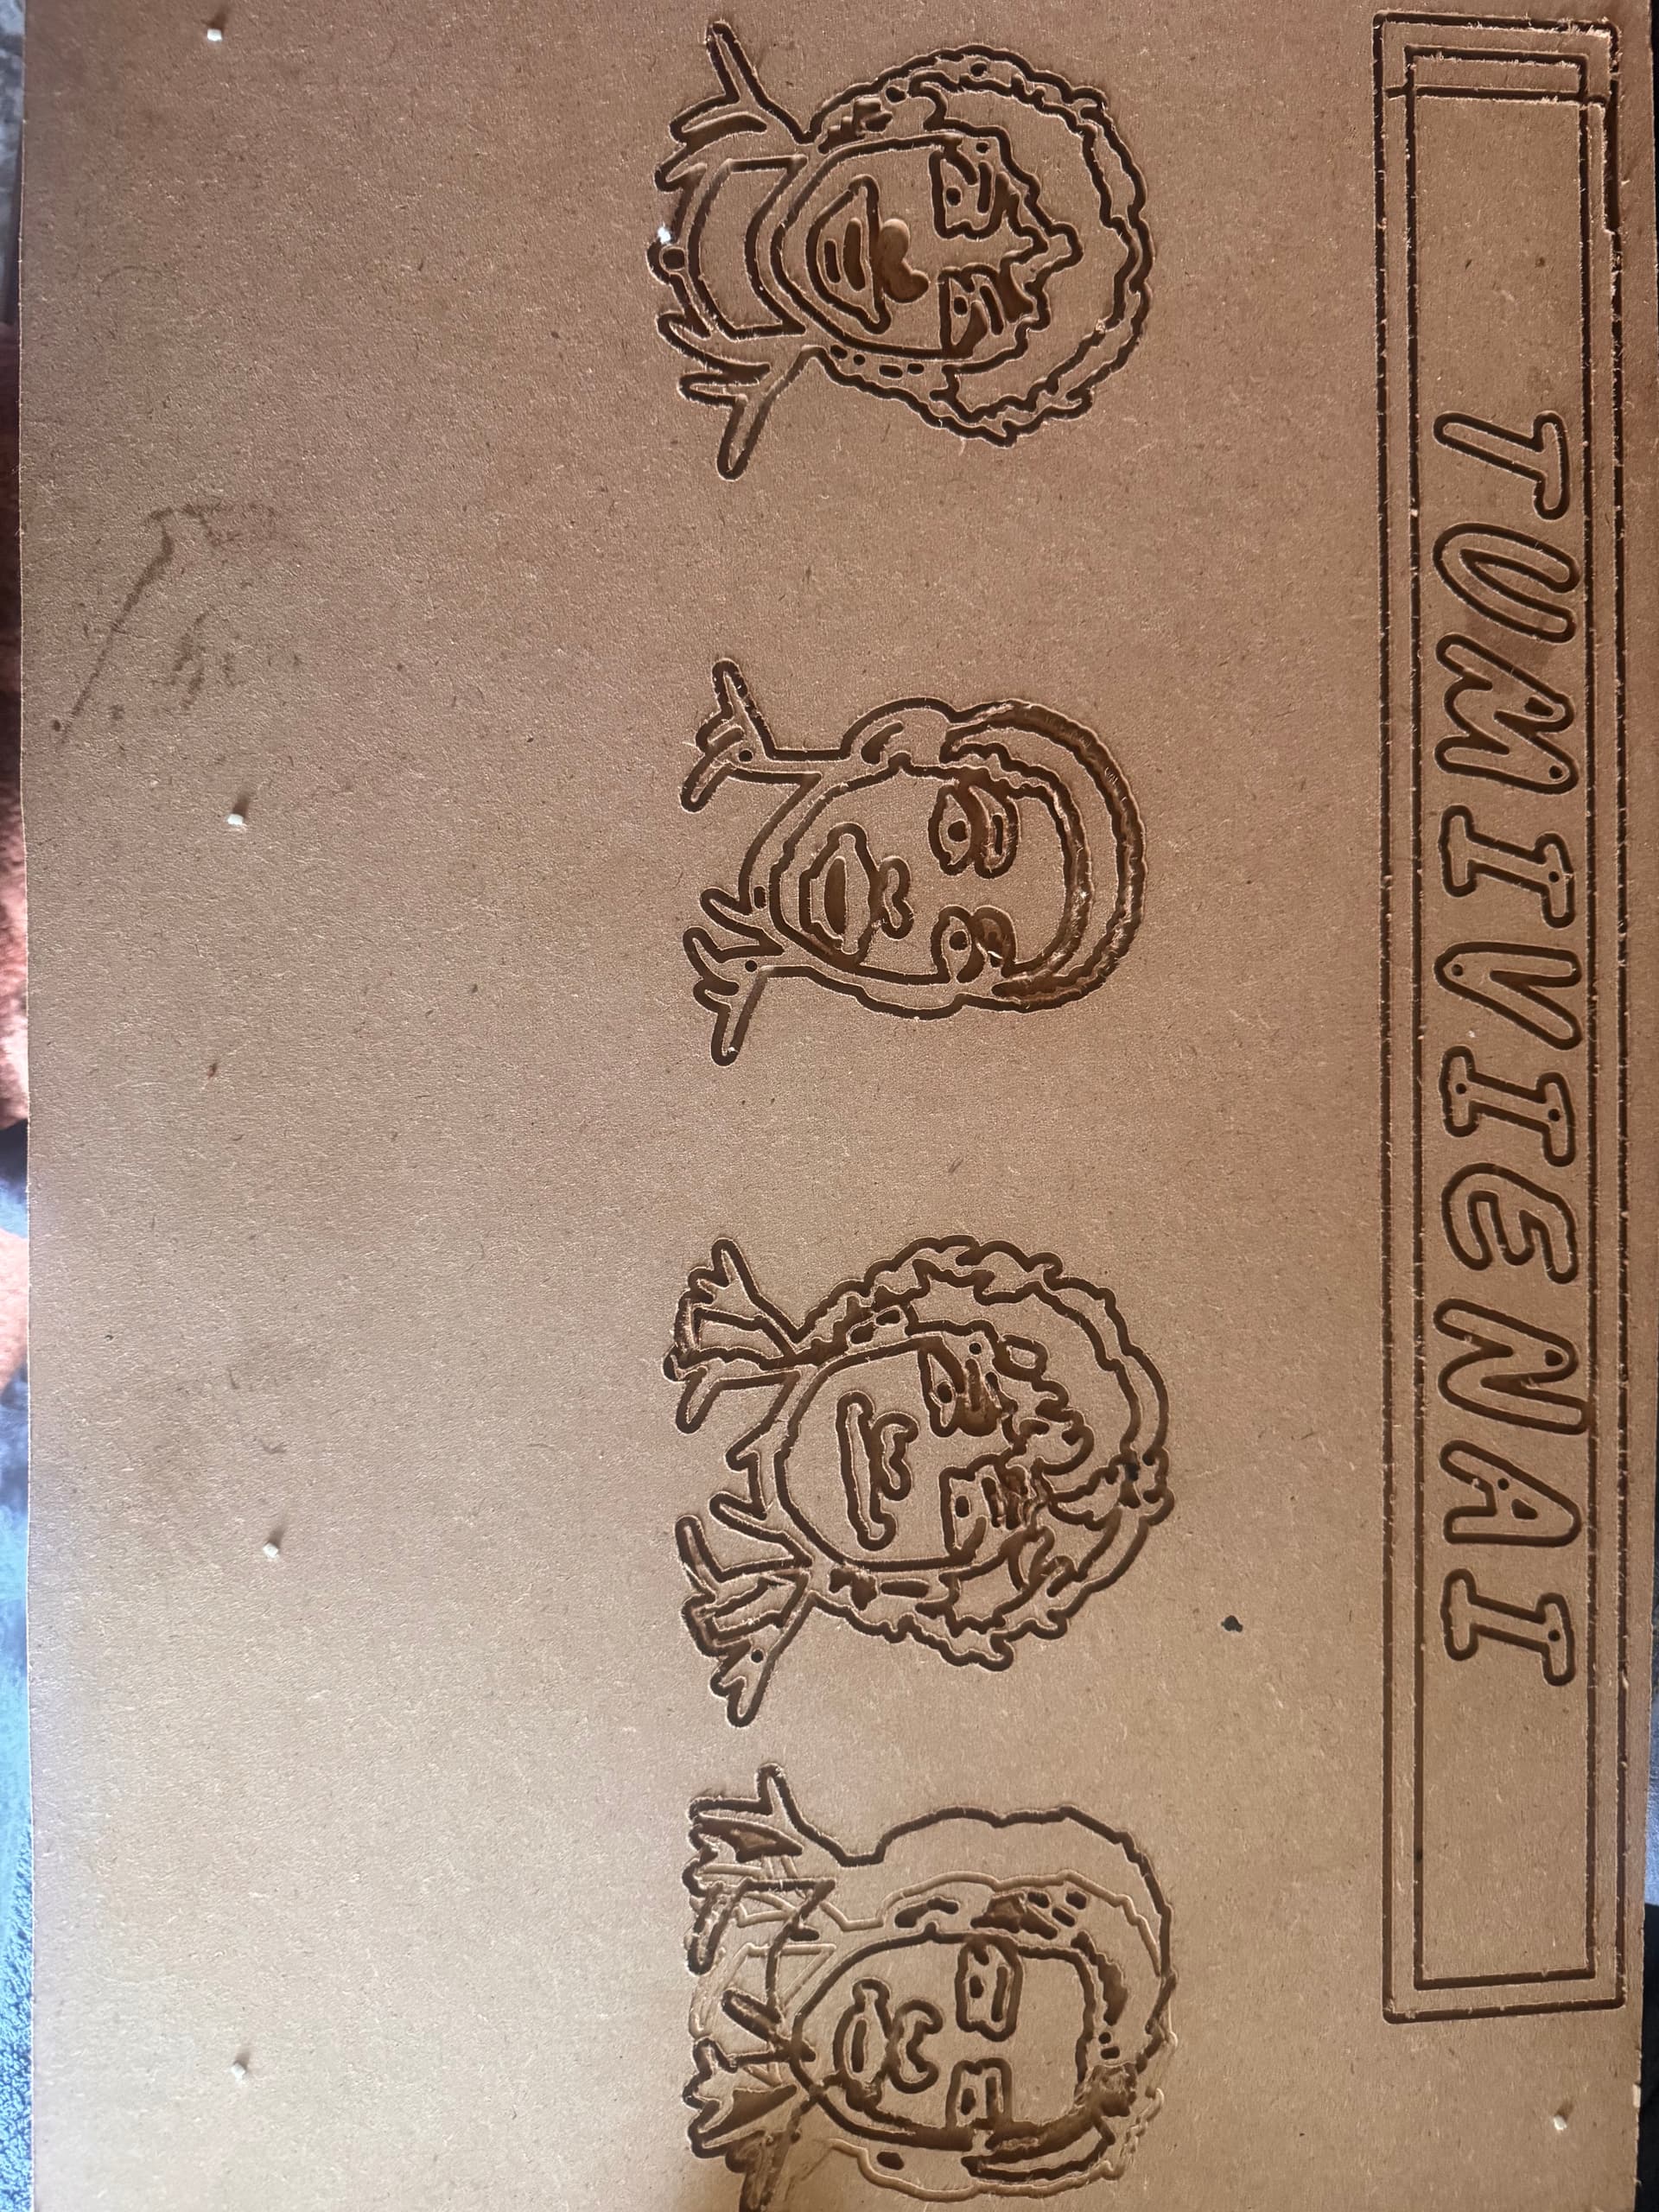
Final CNC-milled tabletop piece featuring the processed face artwork.
2) Molding and Casting
- 3D-printing the two-part mold
- Making plaster and casting test parts
I used a Fusion workflow for a two-part mold design and iterated on fit, release direction, and cavity quality.
3D mold source file: cnc-molding-2part-mold.f3d
The printed mold looks like this: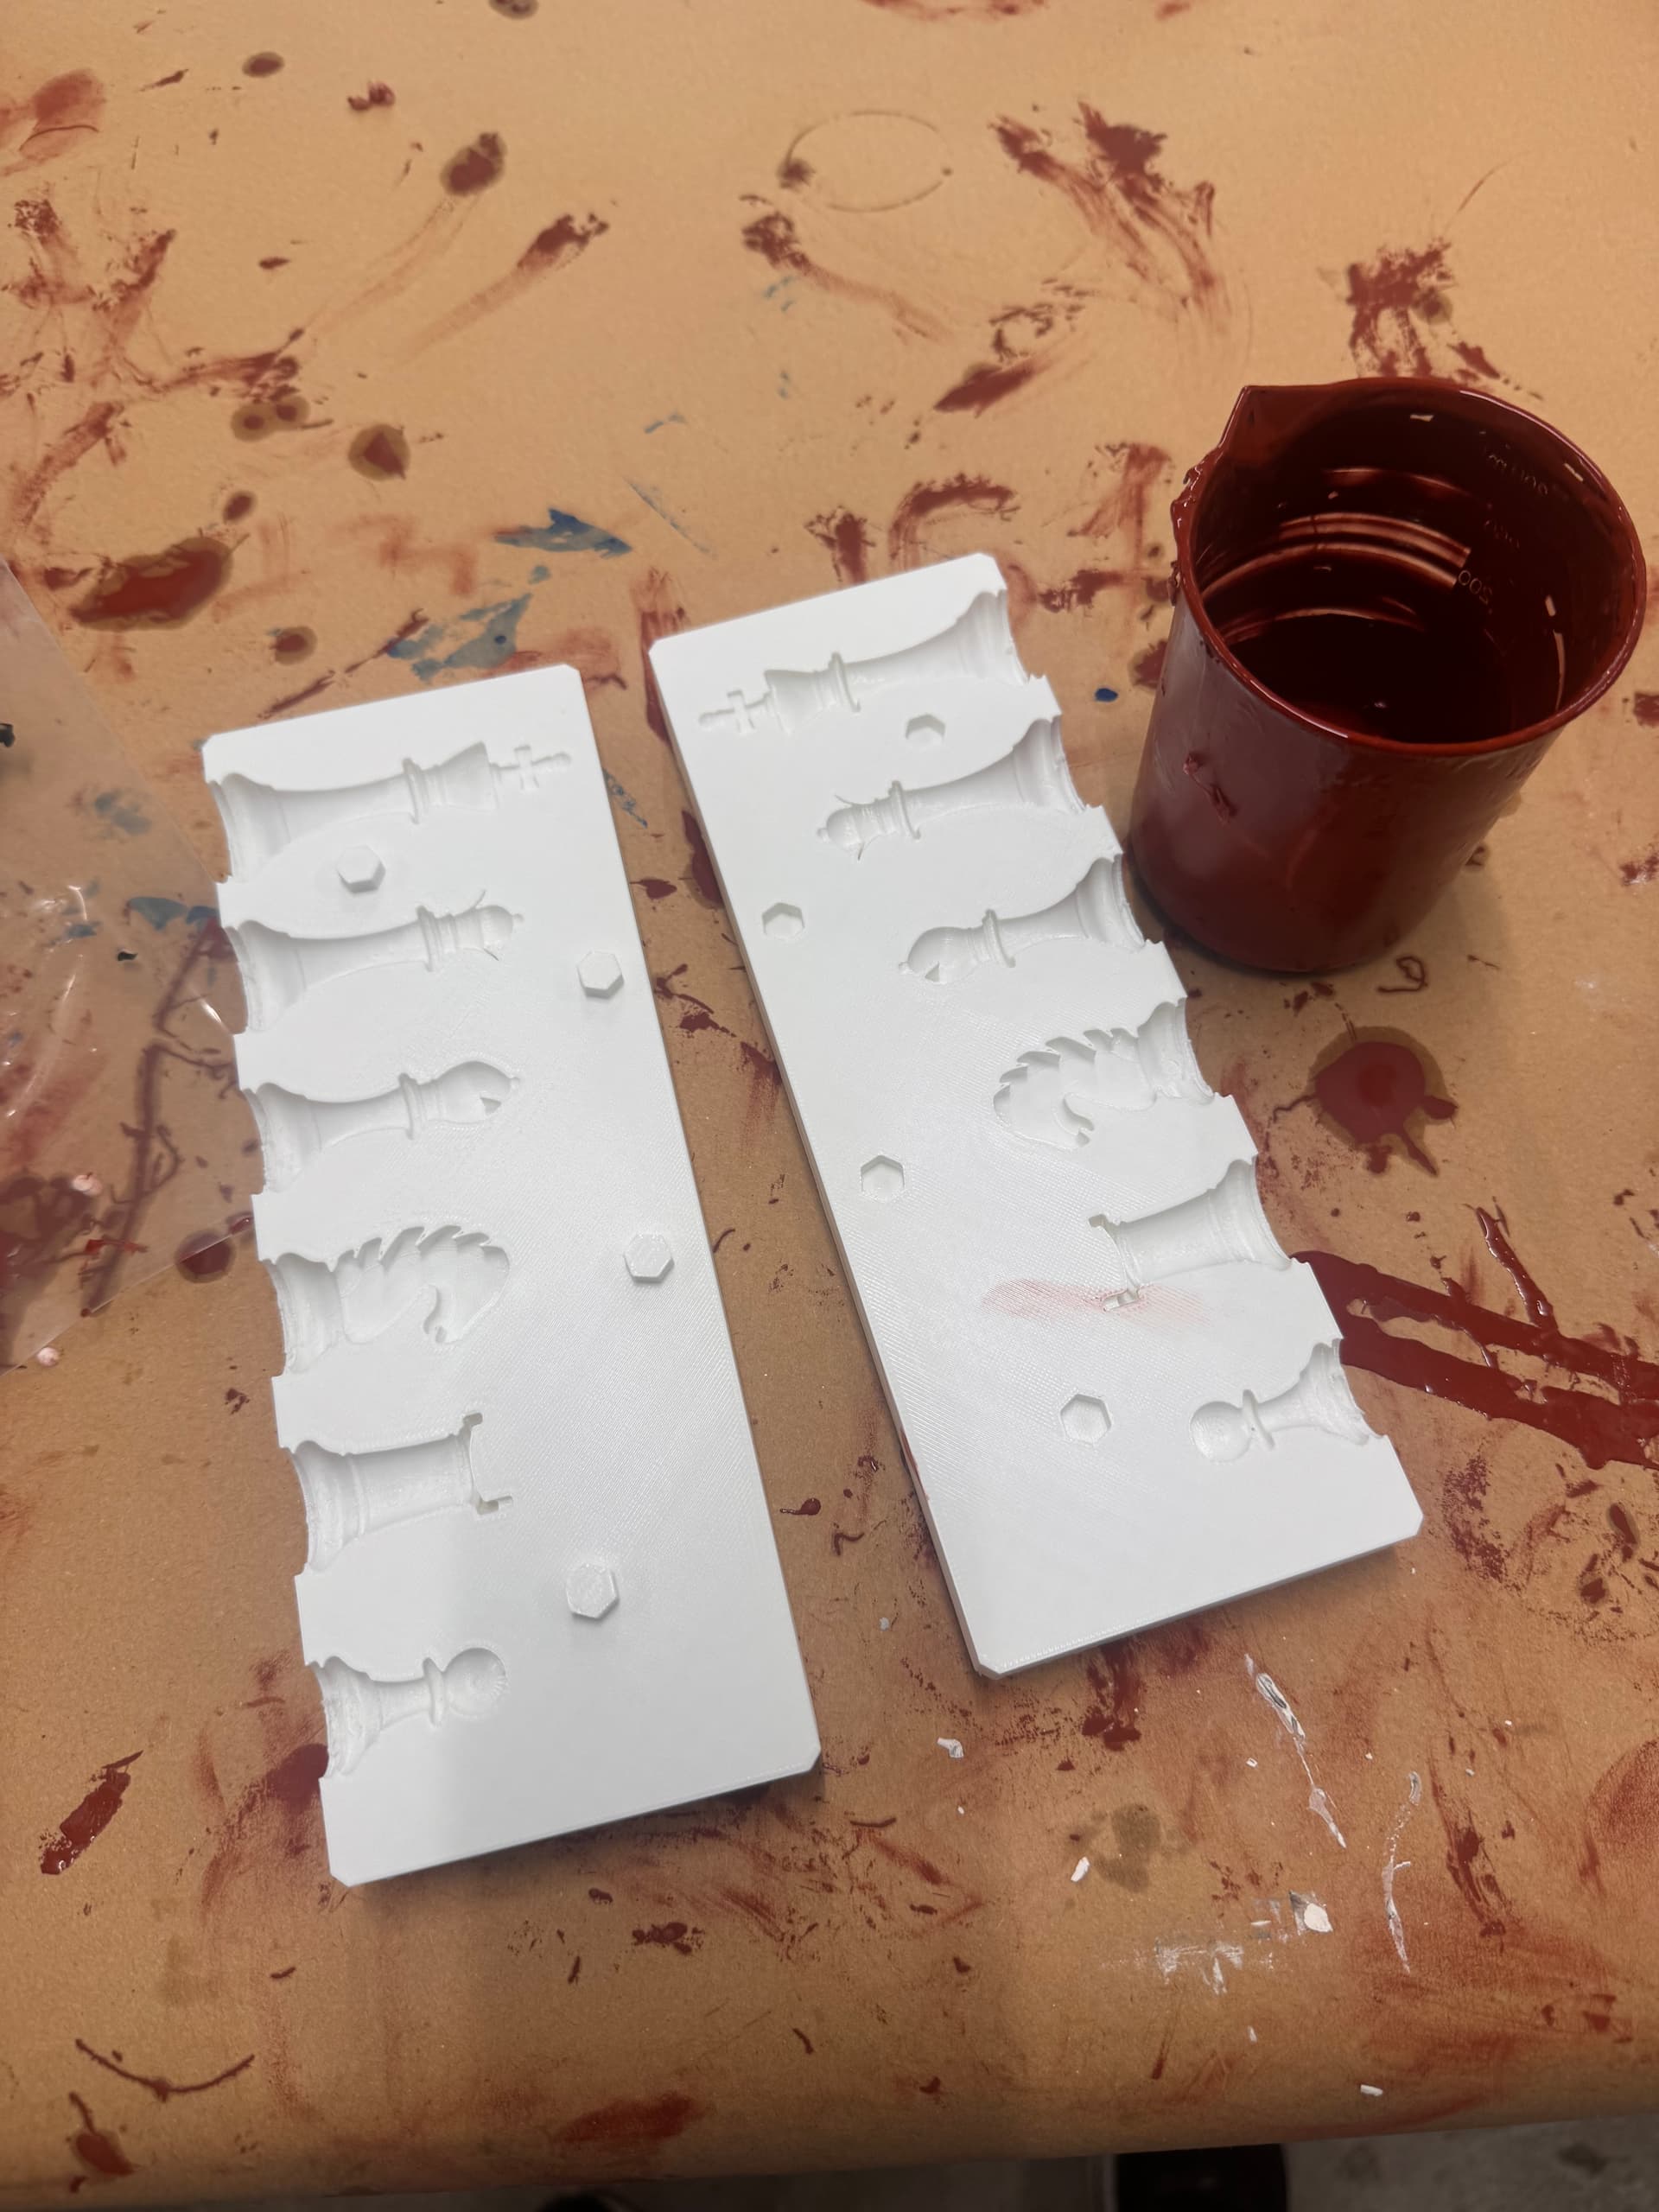
3D-printed two-part mold ready for casting tests.
Tutorial reference: Product Design Online - two-part molds in Fusion 360